This chapter contains the following topics:
Printing a List of Checking Accounts
It is important to appreciate the differences between cash accounts and checking accounts. Every checking account is also a cash account, but the reverse is not necessarily true.
Cash Accounts contains those G/L accounts which are for cash entries. Cash accounts are shared by all Passport Business Solutions (PBS) modules that refer to it (Accounts Receivable, Accounts Payable, Customer Orders, Order Entry, Payroll , Point of Sale and Check Reconciliation). Maintenance of cash accounts is described in the System User documentation.
Checking Accounts (a part of Check Reconciliation and not referenced by any other module) contains records that describe each checking account. This description includes:
| • | The appropriate account from Cash Accounts. |
| • | Basic information about the bank (such as bank number, name, and address). |
| • | The reconciliation method for the checkbook. |
Select
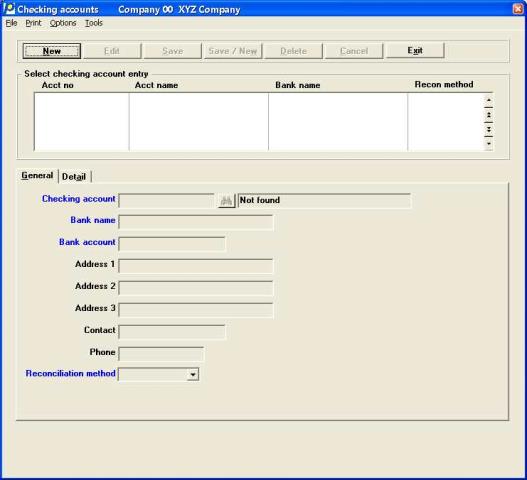
Checking accounts from the C/R menu. The following screen appears:
If there are no existing accounts the screen will look like above.
You can work with both new and existing checking accounts.
The list box displays up to 6 existing checking accounts at a time. You may sort the checking accounts by account number in ascending or descending order. Only column names in red may be sorted. To select a field or change the sort order, click on the column name or the arrow to the right of the column name or use the View options.
To locate a checking account, start typing a account number. You may also use the up/down arrows, Page up, Page down, Home and End keys to locate a checking account. The <F1> and <SF1> keys function the same as the up/down arrow keys.
Checking accounts that display in the list box are available for changes or deletion.
The fields for the checking account selected in the list box display in the lower part of the screen.
The buttons and keyboard equivalents do the following:
|
New |
Alt+n |
To add a new checking account |
|
Edit |
Alt+e |
To edit an existing checking account |
|
Save |
Alt+s |
To save a new account or changes to an existing checking account |
|
Save/New |
Alt+w |
To save a new checking account or changes to an existing checking account and start entering a new checking account |
|
Delete |
Alt+d |
To delete an existing checking account. If there are entries then you cannot delete the checking account |
|
Cancel |
Alt+c |
To cancel adding a new checking account or cancel changes to an existing checking account |
|
Exit |
Alt+x |
To exit to the menu |
Options
You may select Enter notes from the Options menu. See Notes
Character Mode
In character mode, the following screen appears:
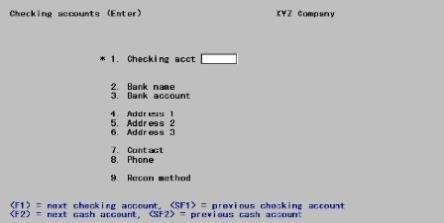
You can work with both new and existing checking accounts.
Enter the following information:
Options
Enter the checking account number, or use one of the following options”.
|
<F2> |
For the next cash account |
|
<SF2> |
For the previous cash account |
|
Example |
Enter account 1000-000 |
Options
Enter the name of this bank or use the option:
|
<F2> |
To use the bank name in Accounts Receievable Bank accounts (from Cash History) for this cash account (if A/R is interfaced) |
|
Format |
25 characters |
|
Example |
Type First National Bank |
Options
Enter your account number at this bank or use the option:
|
<F2> |
To use the bank name in Accounts Receivable Bank accounts (from Cash History) for this cash account (if A/R is interfaced) |
|
Format |
15 characters |
|
Example |
Type 125-6992 |
Enter the bank’s address. These fields are optional.
|
Format |
25 characters for each field |
|
Example |
Type Corporate Teller 27 Main Street Bigtown, Texas 12345
|
Enter a contact person at the bank. This field is optional.
|
Format |
15 characters |
|
Example |
Type Paul Jeffries |
Enter a phone number for the contact person at the bank. This field is optional.
|
Format |
12 characters |
|
Example |
Type 555-123-4567 |
Enter the reconciliation method you want to use: book-to-bank or bank-to-book reconciliation.
In book-to-bank reconciliation, the bank statement is regarded as fixed, and the checkbook is brought into agreement with it. In bank-to-book reconciliation, the checkbook is regarded as fixed, and the bank statement is brought into agreement with it.
Your choice here is used in Reconcile bank statements. If you are unsure about which one to use, select book-to-bank, which is the most common method.
Select Book-to-bank reconciliation, or Bank-to-book reconciliation.
In character mode enter 1 for Book-to-bank or 2 for Bank-to-book.
|
Format |
Graphical mode: Drop down list, the default is Book-to-bank Character mode: either 1 or 2. The default is 1 |
|
Example |
Press <Enter> for Book-to-bank reconciliation |
Select the Save button to save your changes. For a descriptions of all the buttons see Buttons.
Character Mode Completed Entry Options
Options
Make any needed changes, or use one of the following options:
|
<F1> |
For the next checking account |
|
<SF1> |
For the previous checking account |
|
<F3> |
To delete this checking account |
|
<F6> |
For entering notes on a checking account |
|
Example |
Press <F6> for entering notes on a checking account |
Press <F6> or select Enter notes from the Options menu to enter any notes about the checking account. The notes entry window appears:
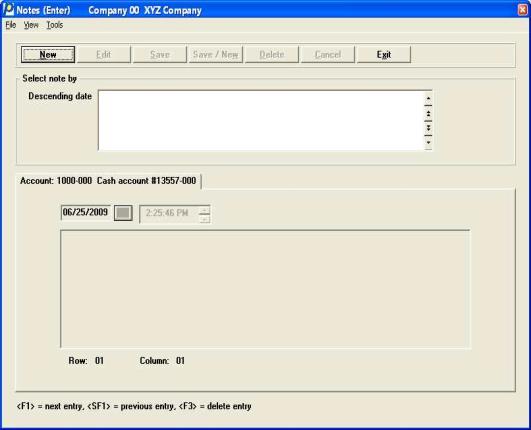
Notes that you enter here may be printed on the report or viewed in other selections when working with checking accounts. Select the New button <atl+n> to enter a note. Select Save <alt+s> to write the note to the file/table.
In character mode checking account notes use the PBS text editing function, described in the Using Notes section of the Use of Function Keys, Tool bar and Windows chapter of the PBS System documentation.
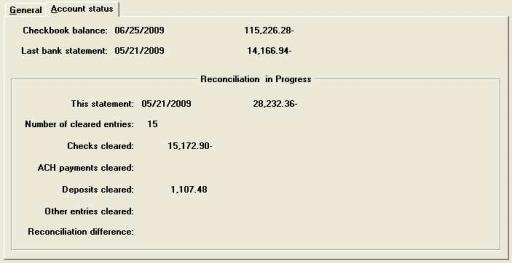
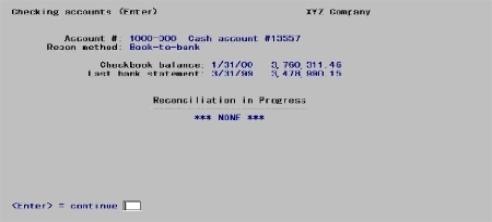
The account status tab shows the account number, reconciliation method, checkbook balance, last bank statement date, and whether a reconciliation is in progress.
Graphical Mode
The Account status tab looks similar to the following:
Character Mode
In character mode this occurs:
When you press <Enter> at Field number to change ?, you are asked whether you want to view the status of this checking account.
If you answer Y, a new screen displays showing the account number, reconciliation method, checkbook balance, last bank statement date, and whether a reconciliation is in progress.
Select
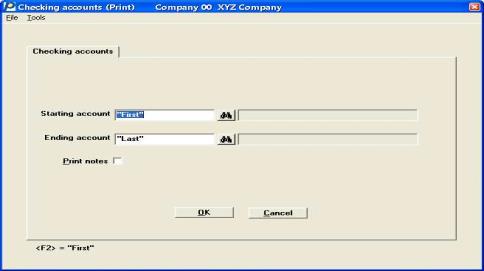
Checking accounts from the Reports menu.
The following screen displays:
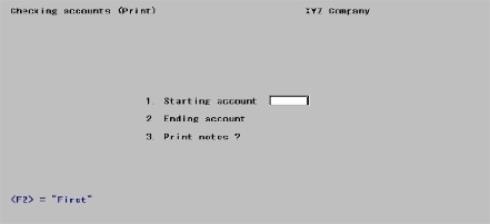
In character mode, the following screen displays:
See a Checking Accounts List example in the Sample Reports appendix.
Enter the following information:
Enter the starting and ending account numbers or use the option:
|
<F2> |
For the "First" checking account on the starting account field and "Last checking account on the ending account |
|
Format |
Your standard account number |
|
Example |
Press <F2> for both fields |
Your answer here determines whether any notes entered above are printed.
|
Format |
Graphical mode: Check box, checked is yes and unchecked is no. The default is unchecked Character mode: Y or N. The default is N |
|
Example |
Check the box or enter Y |
Select OK to select a printer and print the report or Cancel to return to the menu without printing.
Character Mode
At Field number to change ? make any needed changes, then press <Enter>. Select a printer or view option and the Checking Accounts List will be printed.